Before starting to polish it is important to gather all of your supplies for this mani. I used all of the polishes in the photo along with a paper plate, a cup with some acetone in it and a nail art brush. Instead of a paper plate you could use foil or an artist's palette. I just used what I had on hand. I have an artist's palette on order..can't wait to get that!!
Oh and btw...I learned that acetone and plastic cups don't get along so well LOLOL. I have no clue why I didn't know this already. I'm still giggling...check out the pictures and you'll see why....
The acetone literally ate the bottom out of the cup LOL. I was seeing drips coming from the cup so I ran to the kitchen to get a coffee cup. By the time I got back which was all of about 15 seconds every bit of the acetone was all over my table and the cup...well you can see the remnants LOL.
Now that I have shown my inner blonde, on to the good stuff...
I started with my old stand by base coat Nail Tek II Intensive Therapy. Then I used 2 coats of Essie Marshmallow as the base color and 1 coat of INM Out the Door top coat on top of that. The top coat protects the base color since you are using acetone...you don't want the acetone to take off the base color.
Once that was dry I started on the colors. I used one color at a time. I placed several drops of polish in a puddle on the paper plate followed by putting several drops of acetone and mixing it until I got the consistency I needed. I didn't use any specific order with the colors, I just went randomly. After getting the first color mixed I put 2 spots of that color on all of my nails and I continued this process until I used all of the colors and I was satisfied with the coverage.
You can always add more polish or more acetone directly to your nails in order to get the look you are after. I wanted this to be just a little more washed out than how it turned out (I forgot to take a picture) so I added a coat of Essie Marshmallow on top. It is a sheer polish so it worked perfectly. I then sealed the mani with 1 coat of INM Out the Door top coat. If you get any polish on your skin just use a nail brush and some acetone to clean it right up. I also like those Q-tip Precision Cotton Swabs if the nail brush can't get it all.
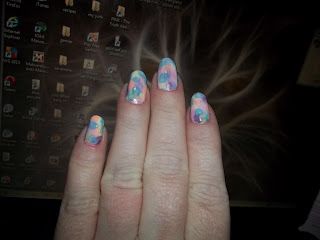
One thing I want to point out, on my middle finger the polish kind of smeared when I put the top coat on. In the photos you can see the purplish brush strokes, but since the mani is so random with the colors and placement and all I just went ahead and left it as it was.
The polishes I used (in the order of the photo) were...
Nail Tek II Intensive Therapy
INM Out the Door Fast Drying Top Coat
Essie Marshmallow
Essie Coat Azure
Sally Hansen Coral Reef
Sally Hansen Bubblegum Pink
Sally Hansen Disturbia
Sally Hansen Hard Lemonade
Sally Hansen Mint Sprint
China Glaze Papaya Punch
I hope y'all like this one as much as I do. Oh and btw...I did this mani on Feb 3rd and I still have it on today Feb 10th, a full week and it shows NO signs of wear at all!! Here are a couple of phots I just took...I can't believe how well this has worn!!!


